How I create custom 2D decals for my 3D prints
Taking printing projects to the next level
How I create custom 2D decals for my 3D prints
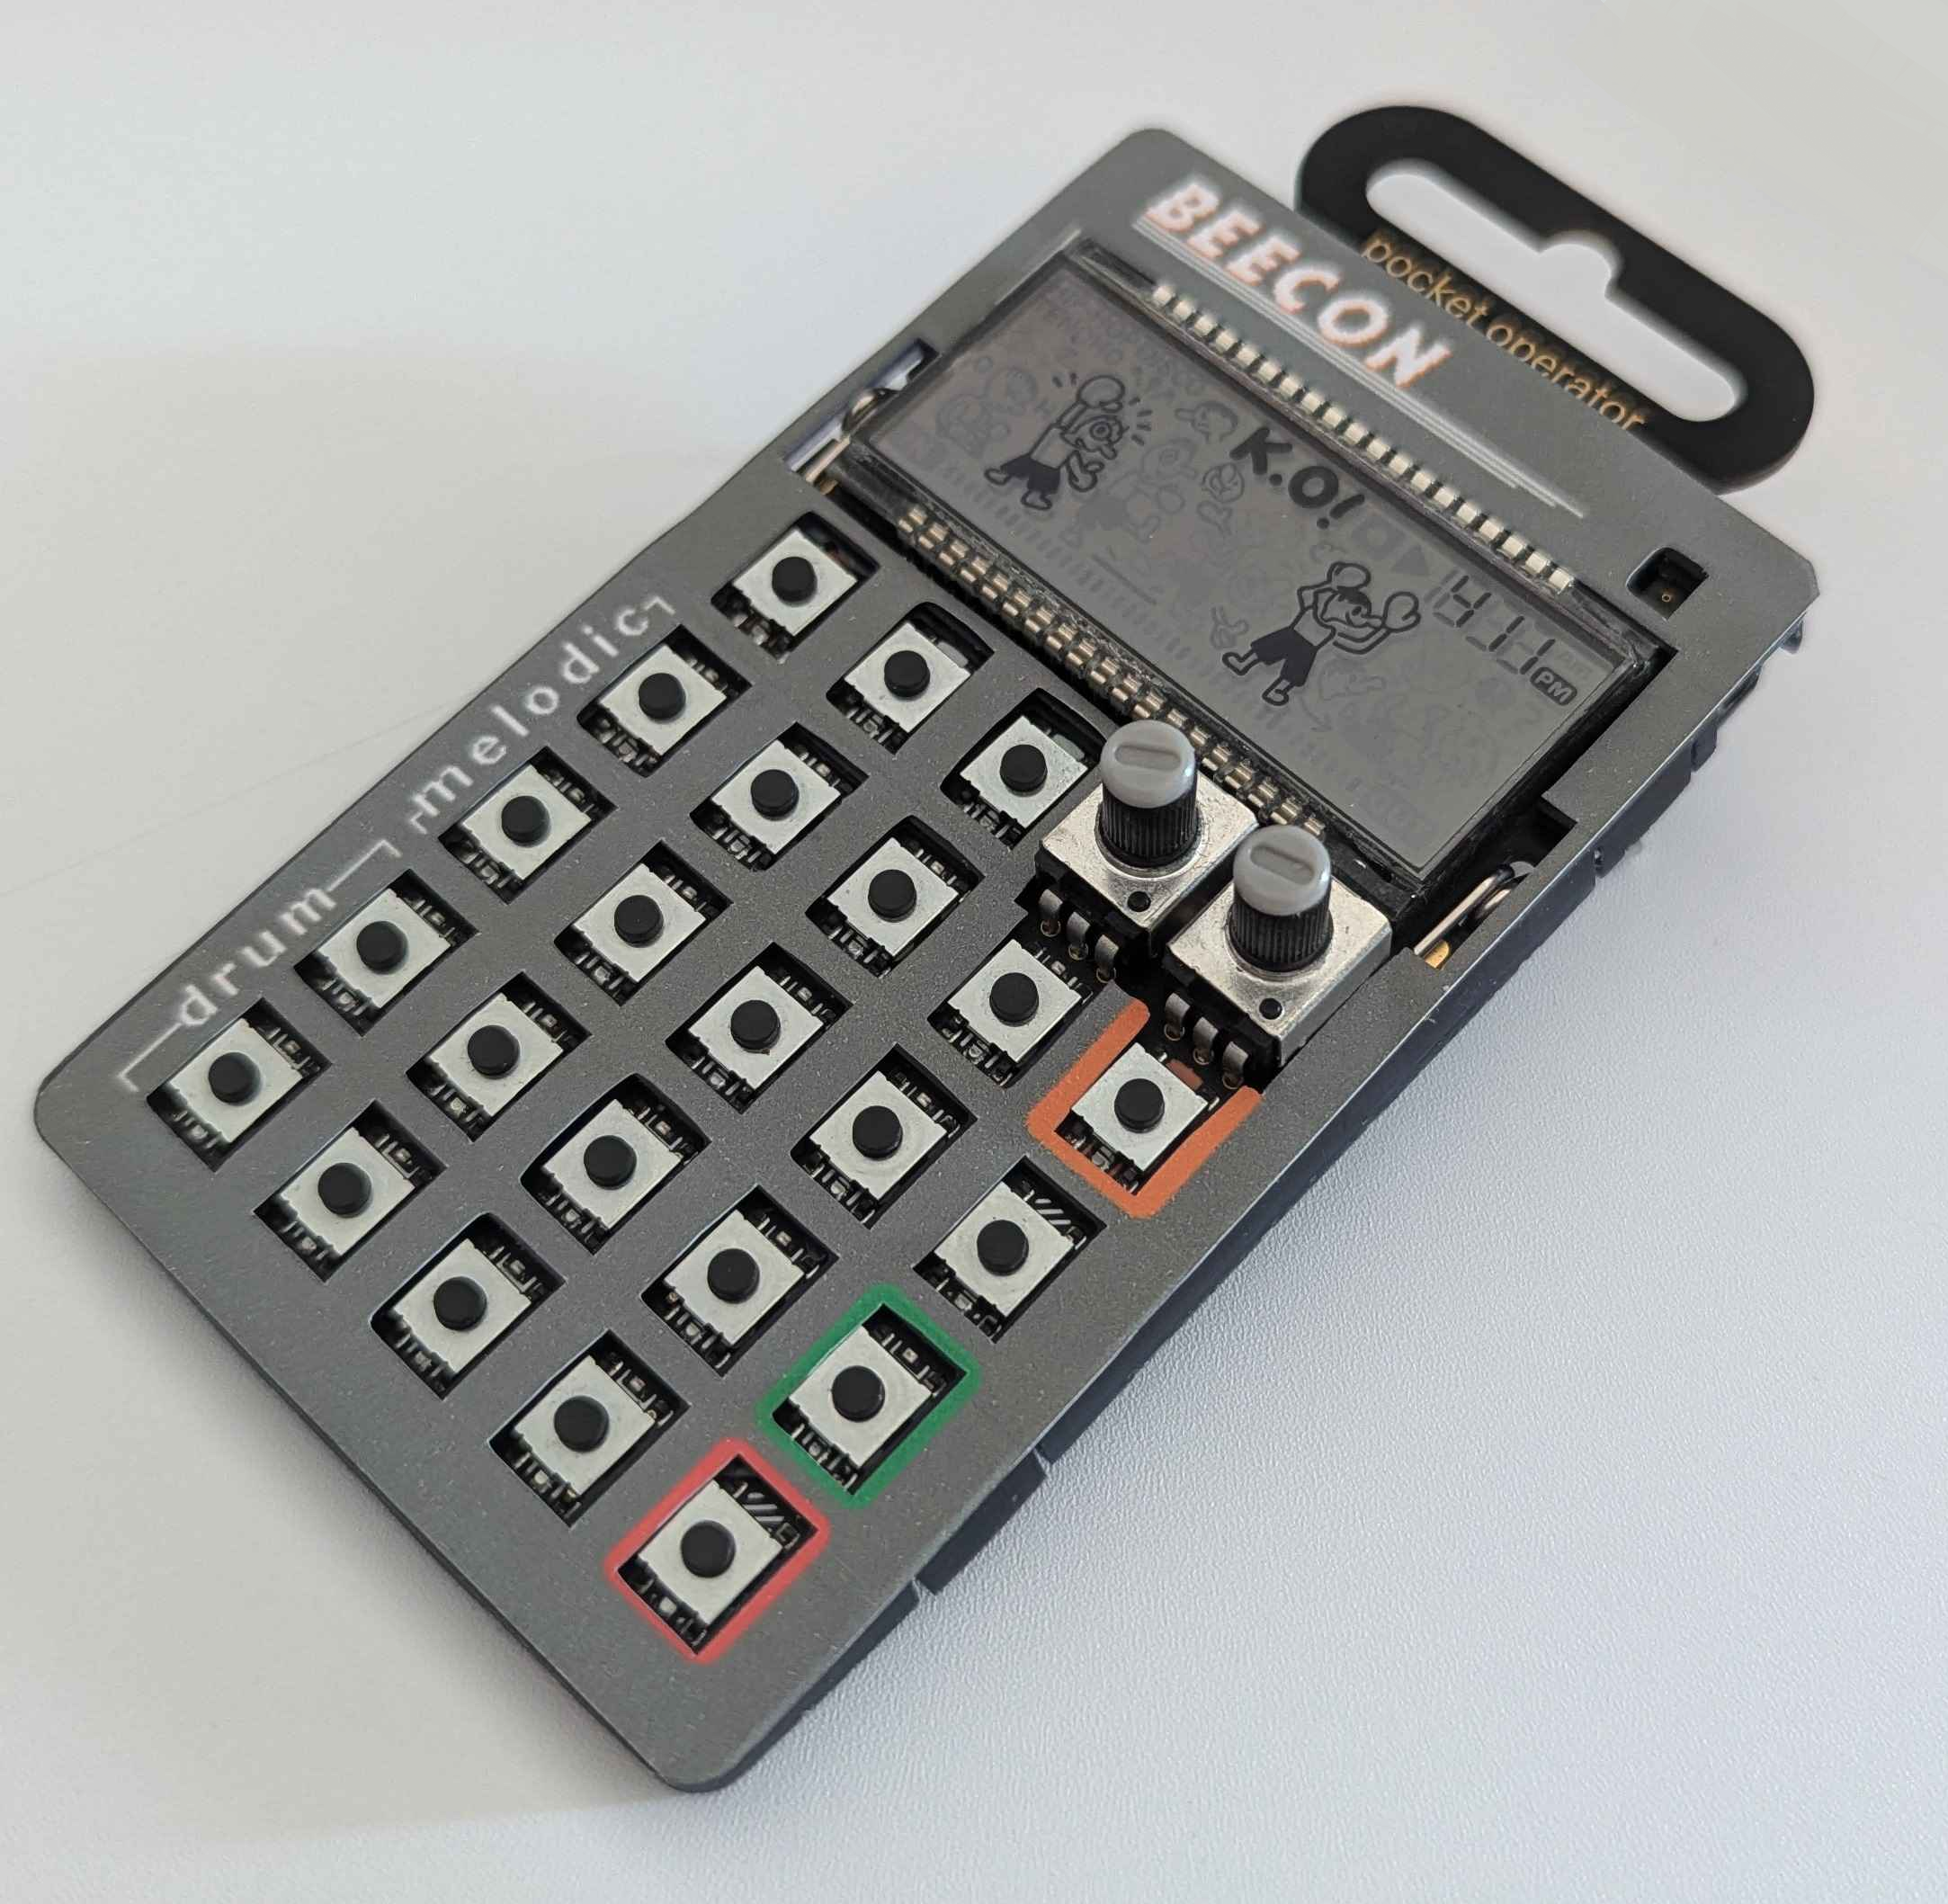
I tested a new resin compound by 3D printing a case for my Pocket Operator. I wasn't happy with the color of this new compound, so I decided to take my Cricut Joy Xtra for a spin.
Why it Matters:
I can now take projects from 1 to 100 as far as design by being able to print custom decals, faceplates, or other designs and cutting them out to fix exactly what a print needs.
- Here is my process, and I am sure it will change as I go.
-
Create a 2D image of the 3D part.
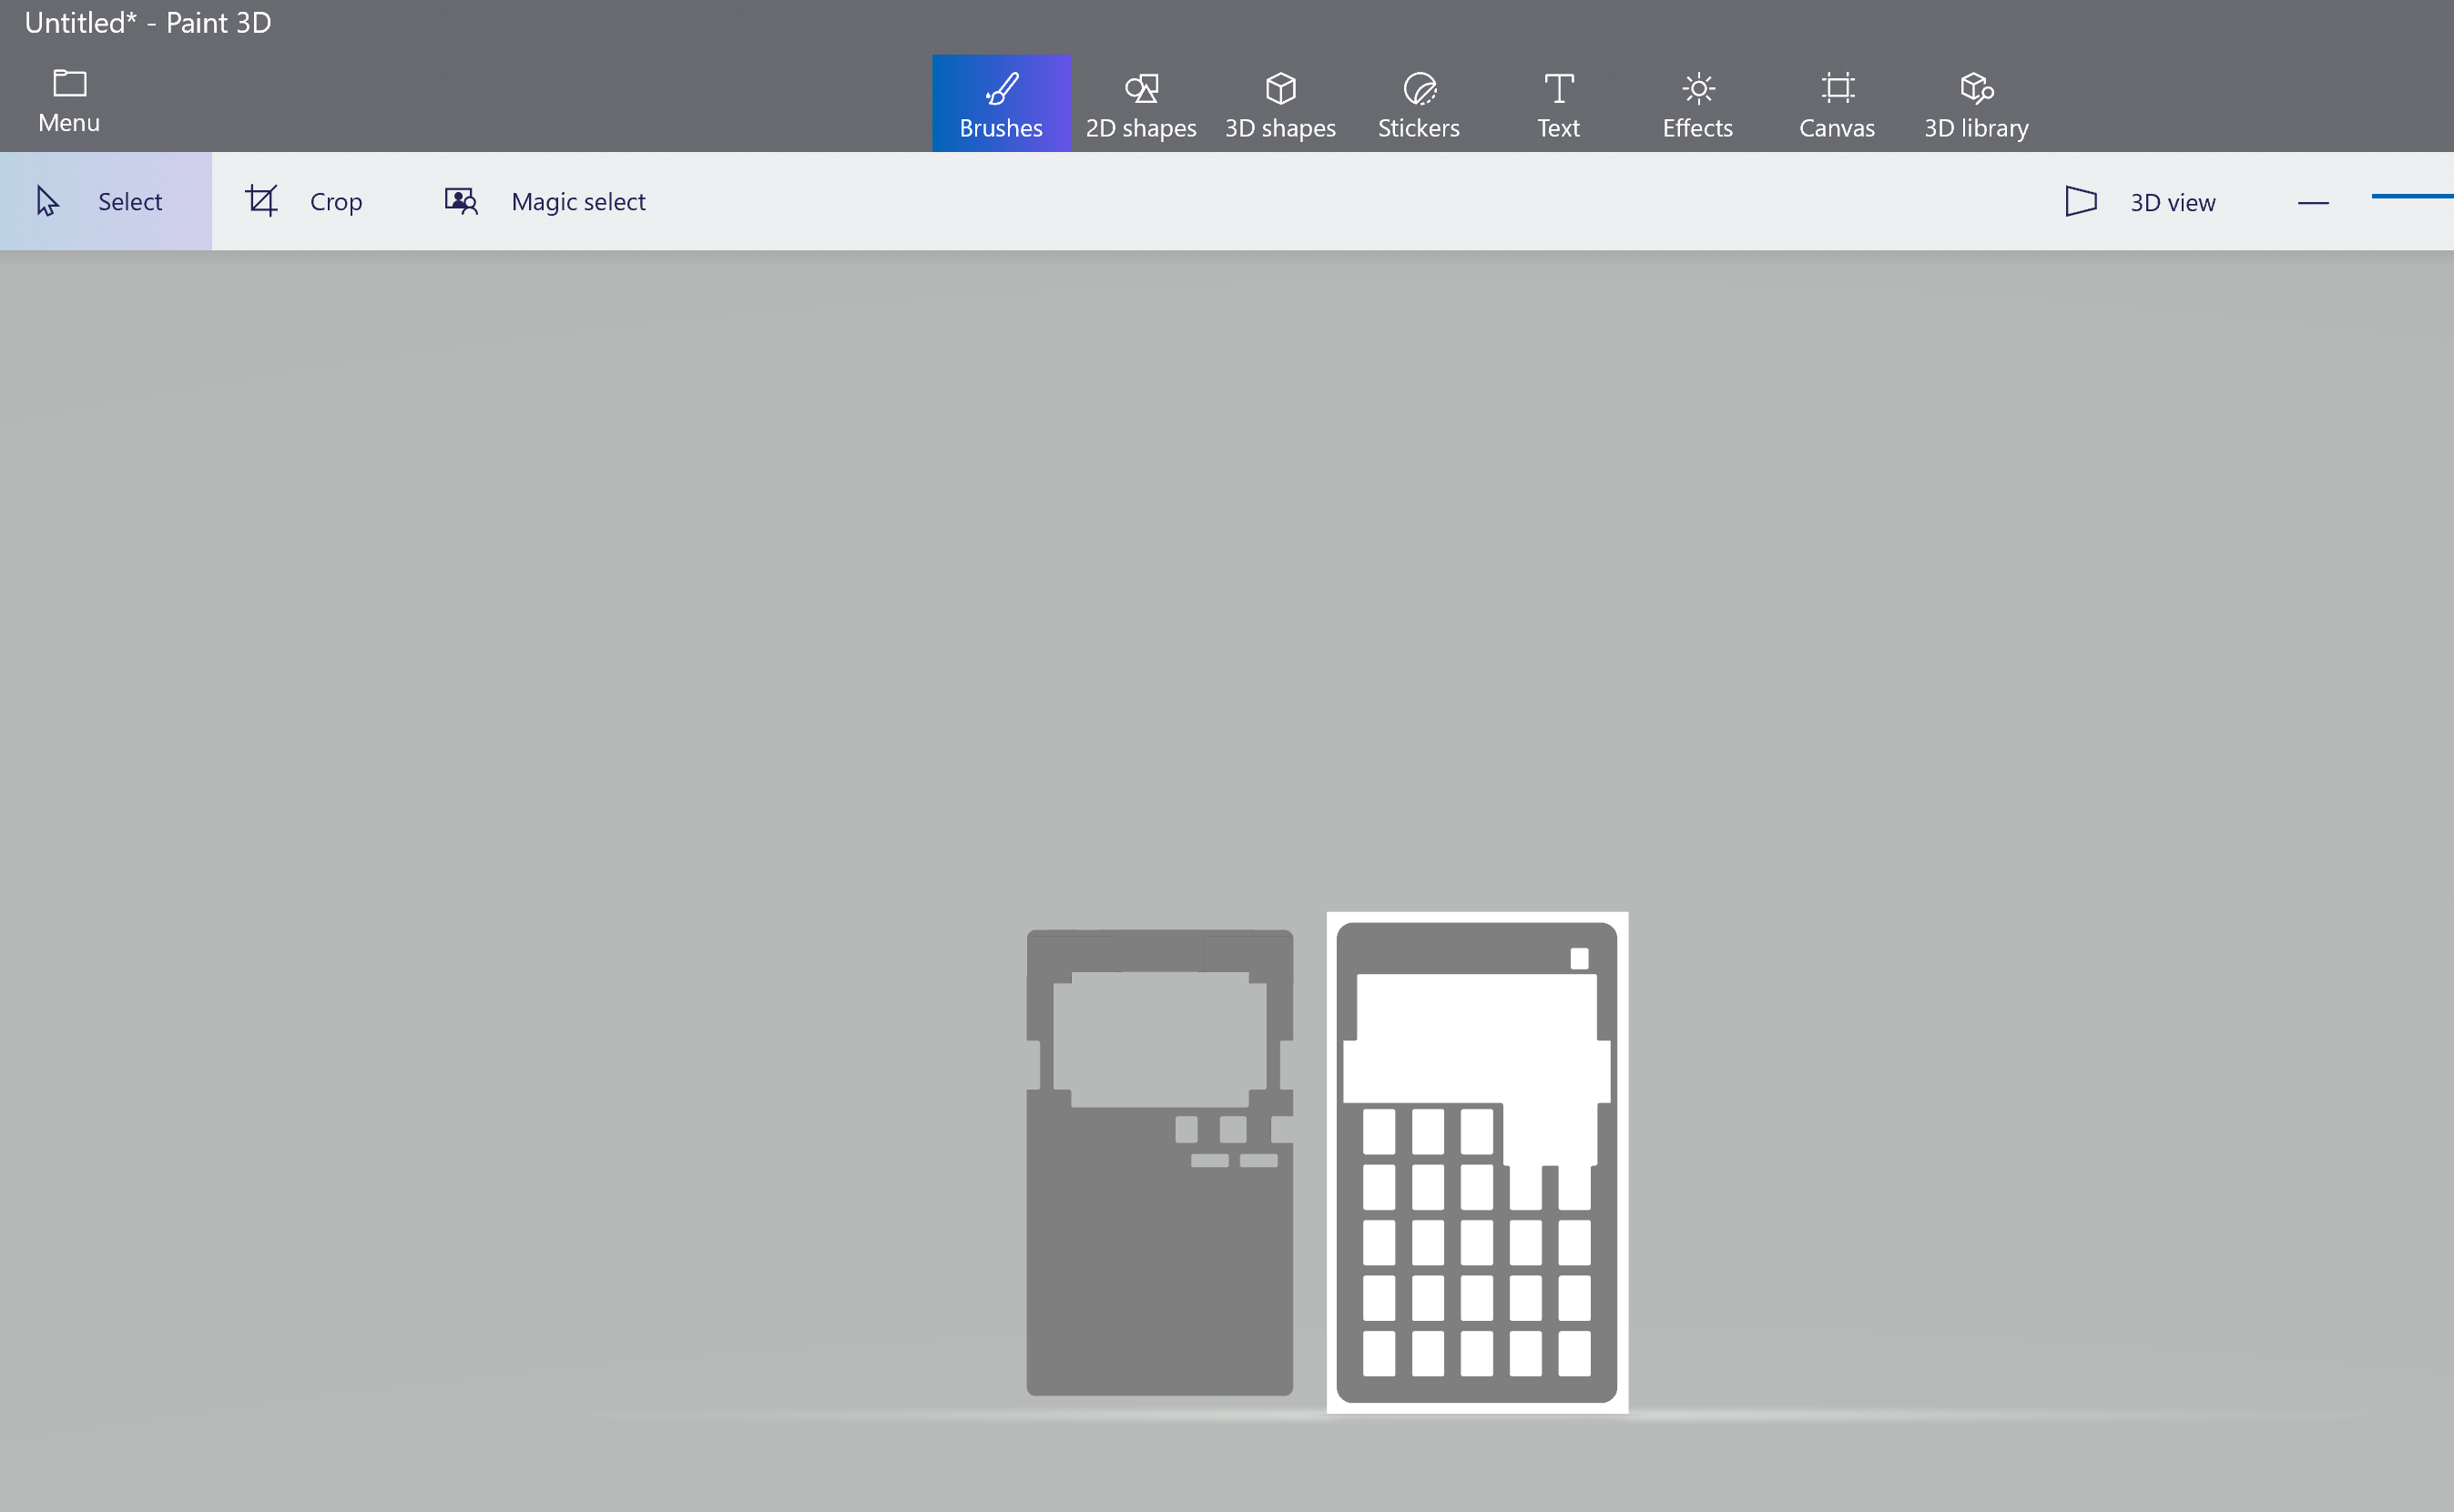
- I took the 3D model (I did not make it) and loaded it into Paint3D.
- In Paint3d, you can see the 3D object overlayed on a 2D background. I cropped the background to only highlight the part of the object that I want to model.

- I saved this image as a PNG. This is the base that I can work with now.
-
Design the face
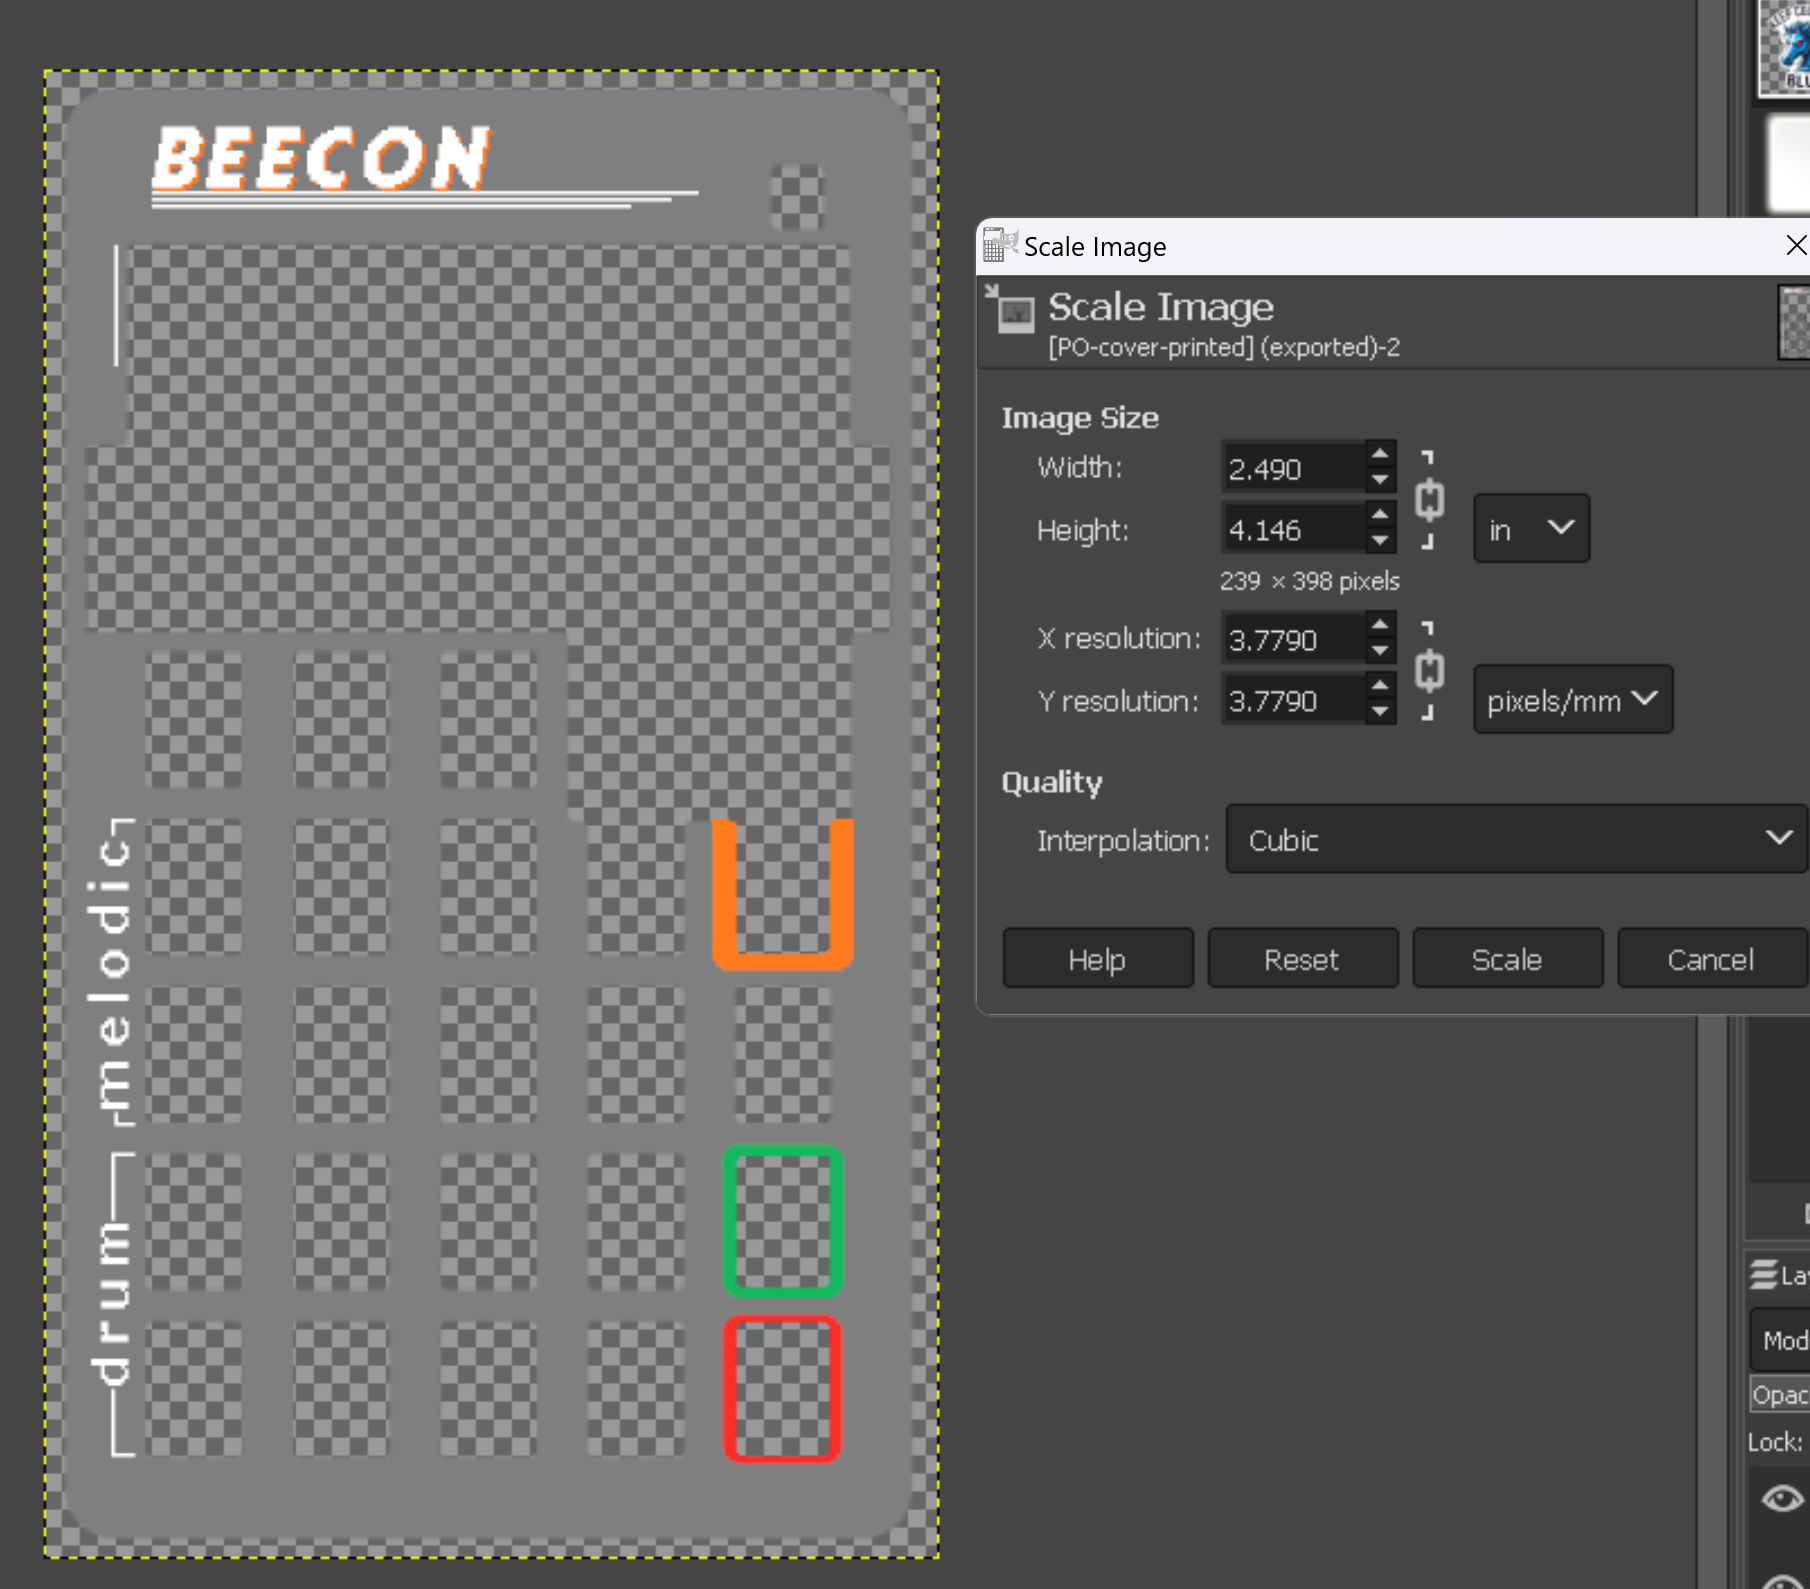
- I took the PNG into an image editor and edited it like I would any image.
-
Get the exact dimensions and export in the correct size
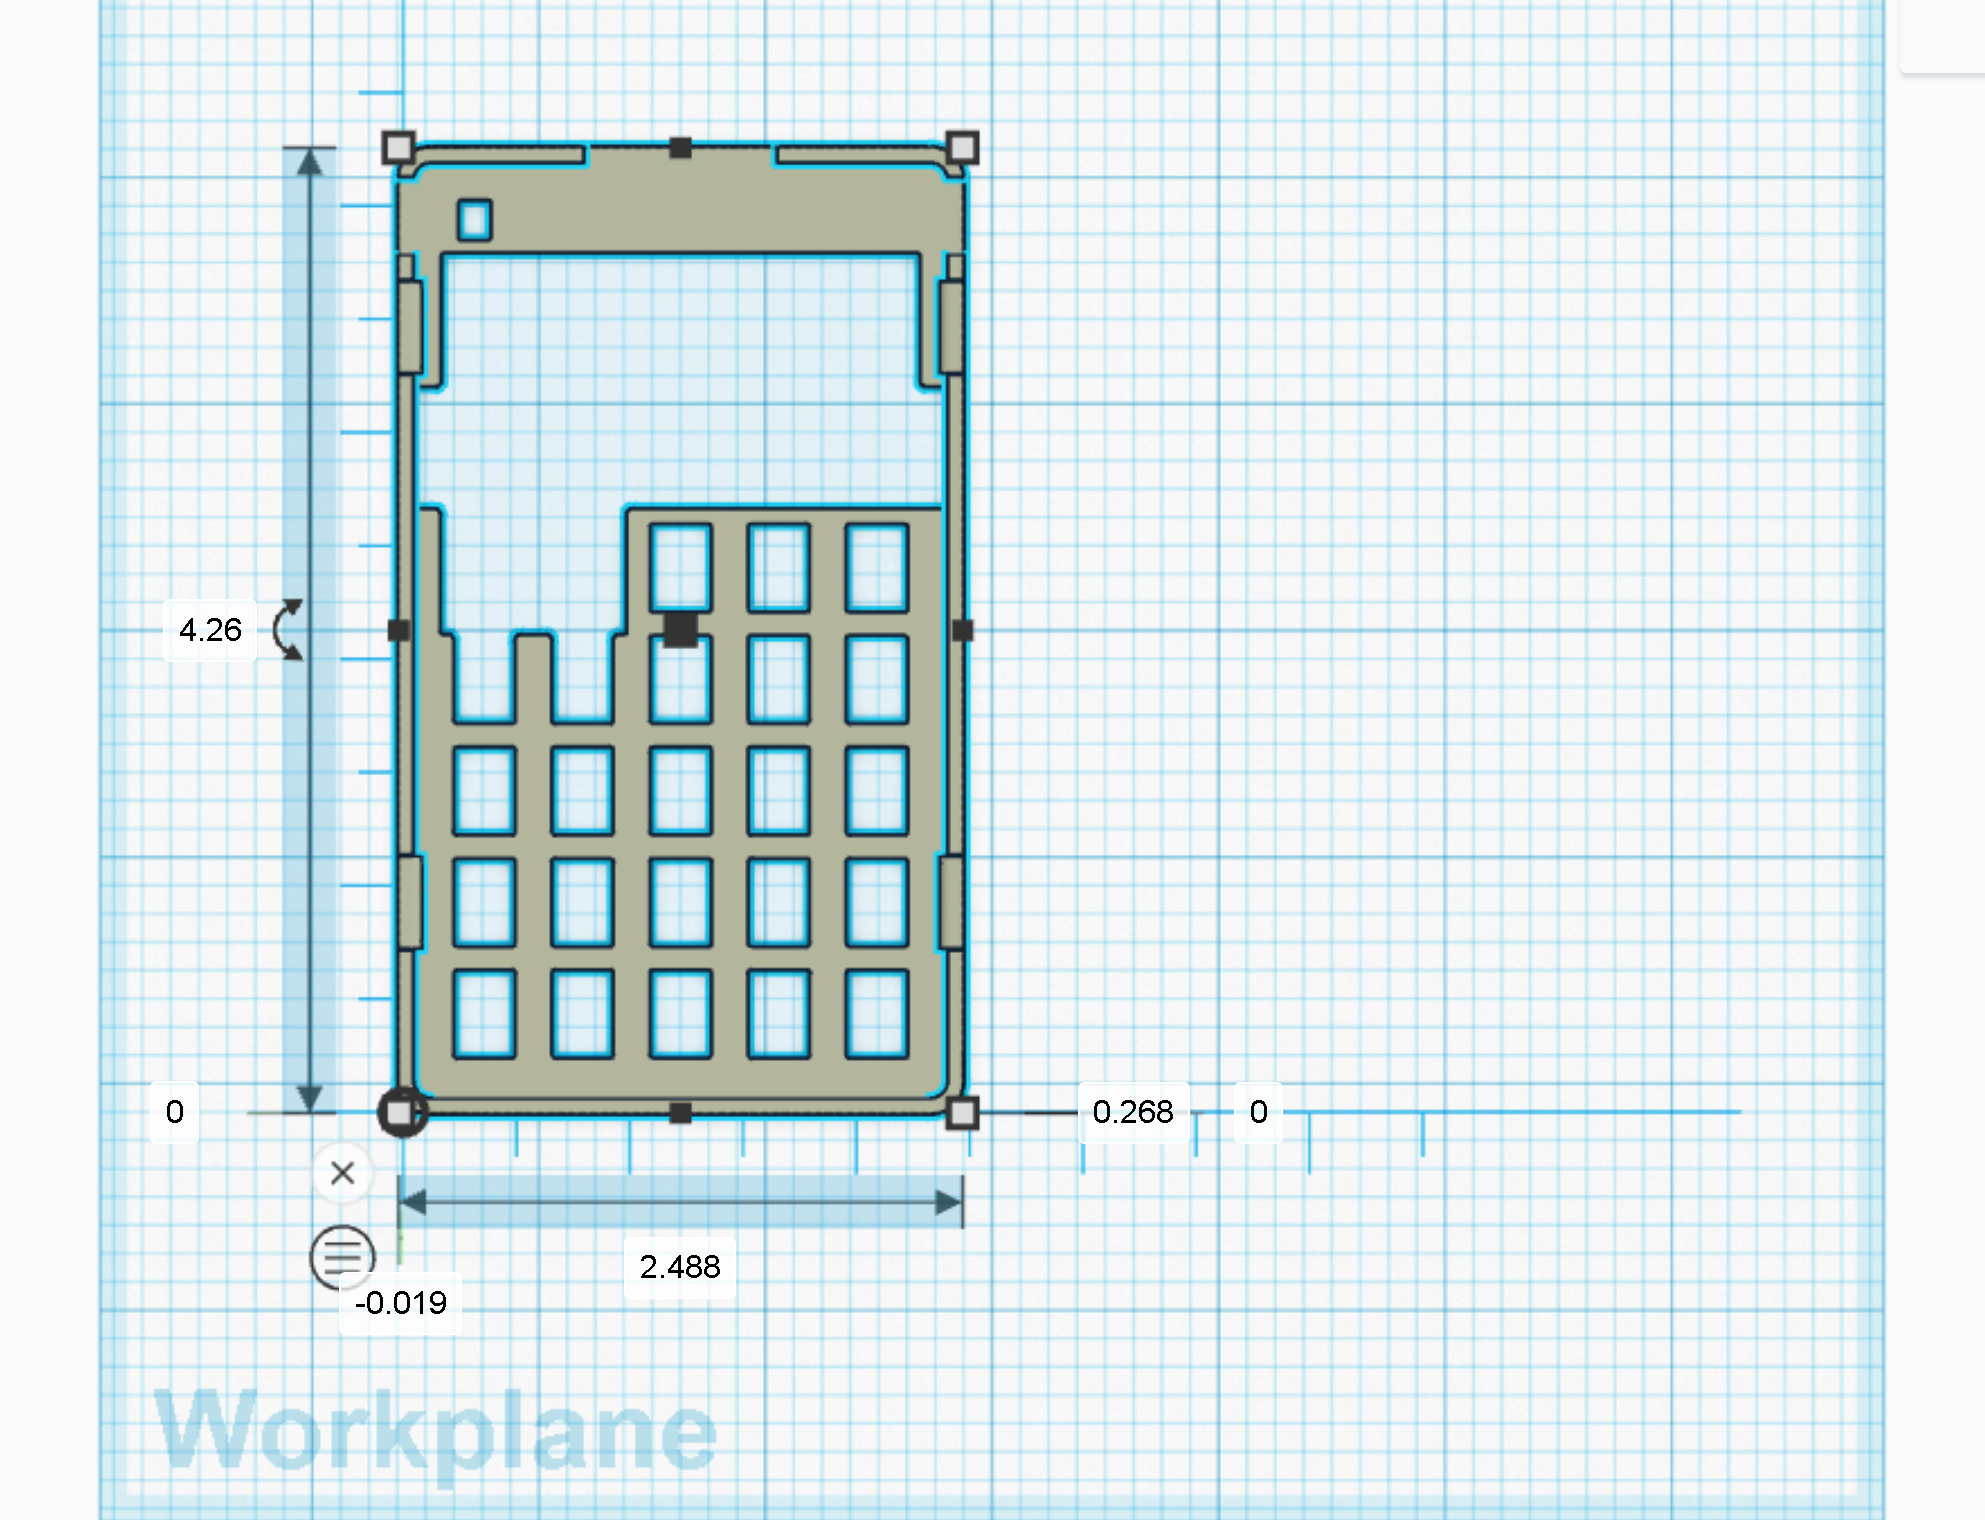
- I opened the 3D model in Tinkercad to get exact measurements. I would love to find a better way to do this.

- I took these dimensions and exported my design to match

- I opened the 3D model in Tinkercad to get exact measurements. I would love to find a better way to do this.
-
Print and cut
- I loaded the PNG into Cricut design Space, made sure that the dimensions were correct, then sent it off to be printed then cut.
In the End
The design came out looking significantly improved. Next time, I will be using printable vinyl instead of sticker paper, as the finish will look even more professional.

Future Ideas
In the future, I can see this being useful for
- printing decals for action figure
- dashboards for model cars
- custom physical labels on electronics projects.
